Connect with me on Twitter, Instagram & Facebook so you don’t miss the latest blog updates!
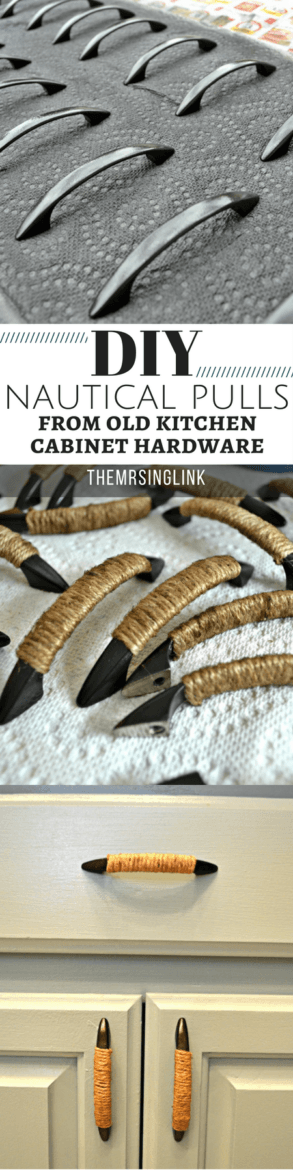
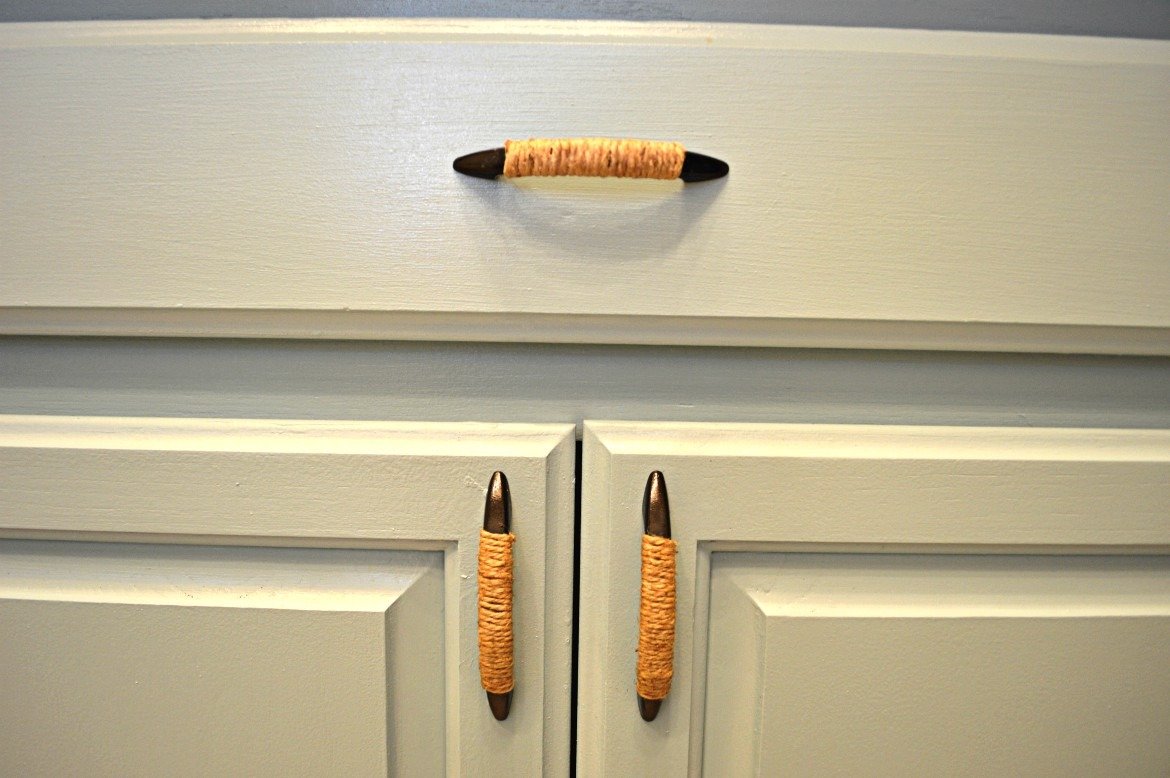
Sick of that plain, old kitchen cabinetry hardware? Well, it’s one of the easiest things to change up the look of your kitchen. You wouldn’t think so, but one of the few things I notice first in any kitchen are the hardware. And changing them up can make a huge impact.
Upon doing research, these drawer pulls, knobs and cups can be anywhere from $3 and up per piece! Needless to say, I don’t have that kind of money, when we’re talking about having to change 15+ hardware pieces. That’s upwards of $100 or more just for that! That’s crazy talk.
But I found a better way to change up your kitchen hardware. My original pulls are the most generic, in fact, you can find them on Amazon. They’re a simple satin nickel cabinet pull and they come in a 25 pack for $29. So if you’re absolutely needing a new change of hardware without the cost – these will do the trick, plus you can always DIY them later.
I changed my pulls using just a few different materials (no more than $15 total cost) into these rustic nautical pulls to compliment my newly renovated kitchen. And I’ll show you exactly how I did it. Check out how good these nautical pulls look!
*This post contains affiliate links. If you purchase through these links, I will receive a teeny weeny commission!*
DIY Upgrade Old Kitchen Hardware Into Nautical Pulls
Materials You’ll Need:
- A lighter
- Thin Rope Twine
- Rust-oleum Hammered Black Spray Paint
- Gorilla Super Glue (must have!)
Directions for Nautical Pulls:
- Whether you bought these nickel cabinet pulls, or you’re using your own, always do yourself the extra step and soak your hardware in soap/water or spray with a degreaser and scrub them very well to get off any built up gunk and grease.

- Once that’s done and they’re dry, lay your hardware face up on newspaper in rows, depending on how many you have. Do the spray paint outside – highly advised! Spray them evenly – don’t hover too long to reduce drippage. You can always go back and do another coat. Make sure to spray the sides as well.
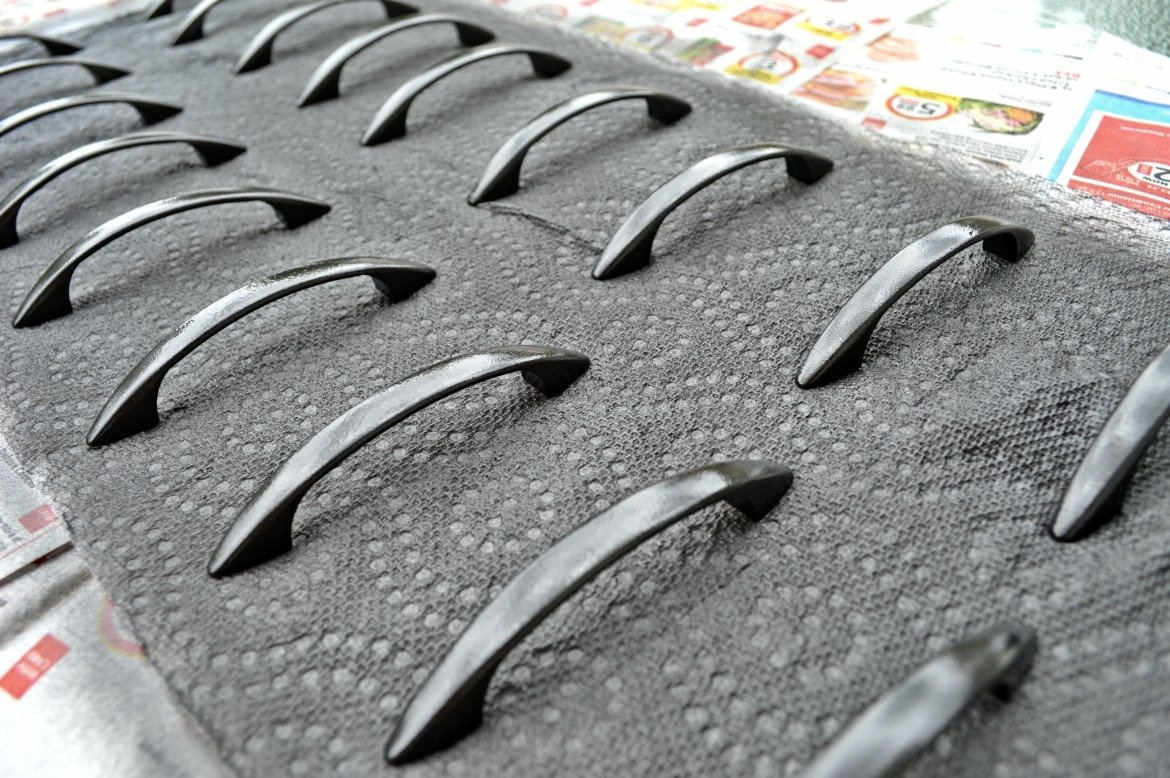
In this case, I didn’t bother turning over my pulls to do the under-bellies. There was no point since they were going to be wrapped in twine. Saved myself a step and reduced the risk of scratches/smudges from turning them over. If you want the under-bellies done, spray that side first! - Allow paint to sit for at least an hour before moving to inside. You’ll notice this spray paint leaves this neat ‘elephant skin-like’ texture, which gives it this rustic feel, and the color isn’t exactly black, either. It’s more a dark charcoal.
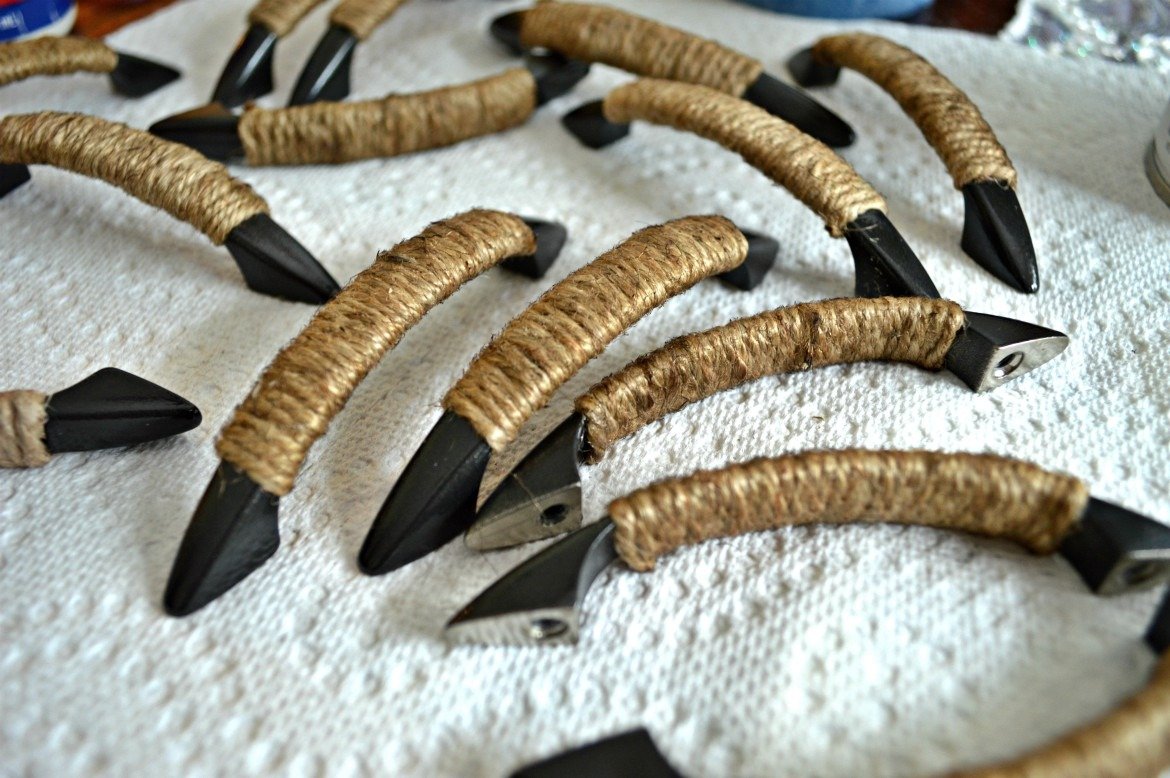
- Once the paint has fully dried (I gave the pulls an entire 24 hours to dry before handling), you’re ready to apply the nautical twine. The first few times are tricky – you’ll get yourself in a system – so take your time! Start by clipping a good two feet of twice for one pull (that should be enough), and start with one end by wrapping over the edge to begin – as shown in the picture below. You’ll apply glue there at the end.
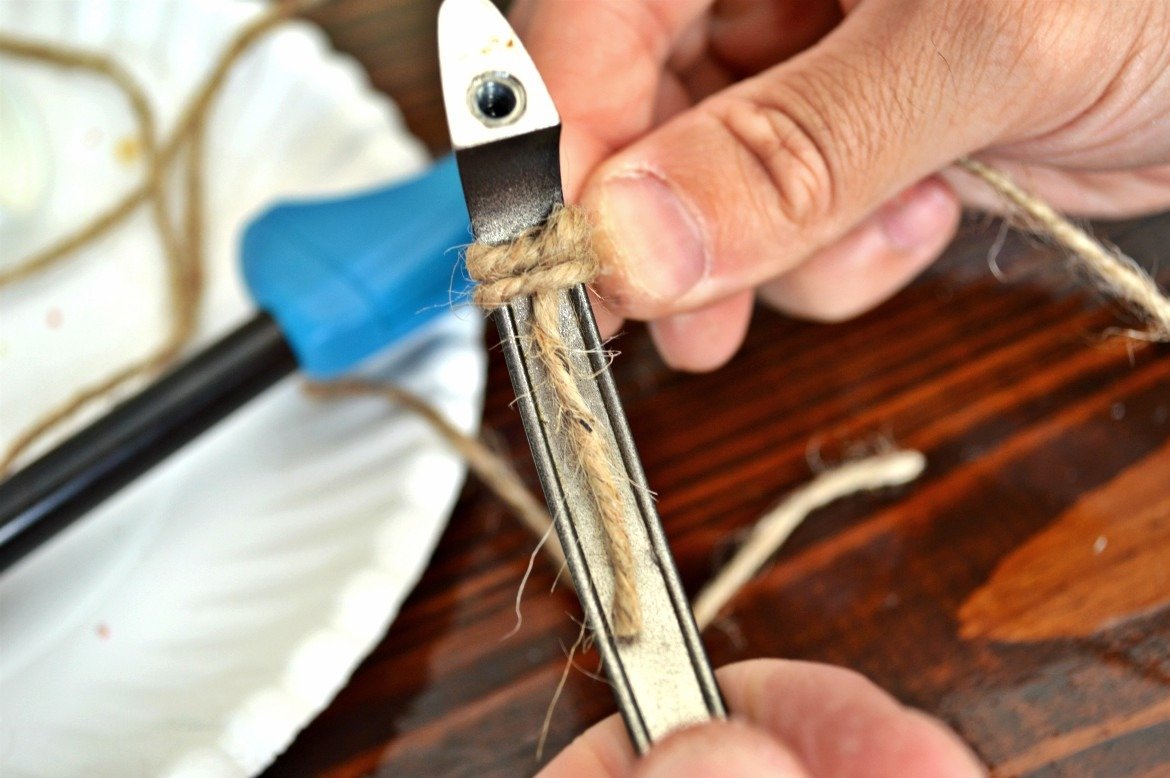
- Wrap 4-5 times around the pull, then drag the loops with your other hand down so they’re tightly together. Do this every 5 loops to get a tight wound. You don’t need glue for the wrapping portion (yay!)
- Once you get to the end, hopefully there is enough twine leftover to be able to glue the last loop down. Using the gorilla super glue (hopefully that’s the one you have, otherwise you’re holding that twine down for a while to dry!), apply a good amount on the under-belly of the pull where your last loop with wrap over. Use a pen to lightly push down the twine into the glue and hold for about 60 seconds. Once mostly dry, cut the excess as close to the pull as you can with scissors.
- You’ll notice – this twine is SUPER FRIZZY – and your nautical pulls will look absolutely ridiculous. Right? That’s where the lighter comes in. Don’t worry, it won’t burn the twine I promise! It will only burn the little hairs that stick out and stray – do it. You’ll be amazed. Lightly wave the flame of the lighter over the twine of the pull – as long as you keep moving it, it won’t burn. You might see a little bit of black, but that can rub off pretty easy. See the before and after from the images below.

Before (See? Frizzy!) 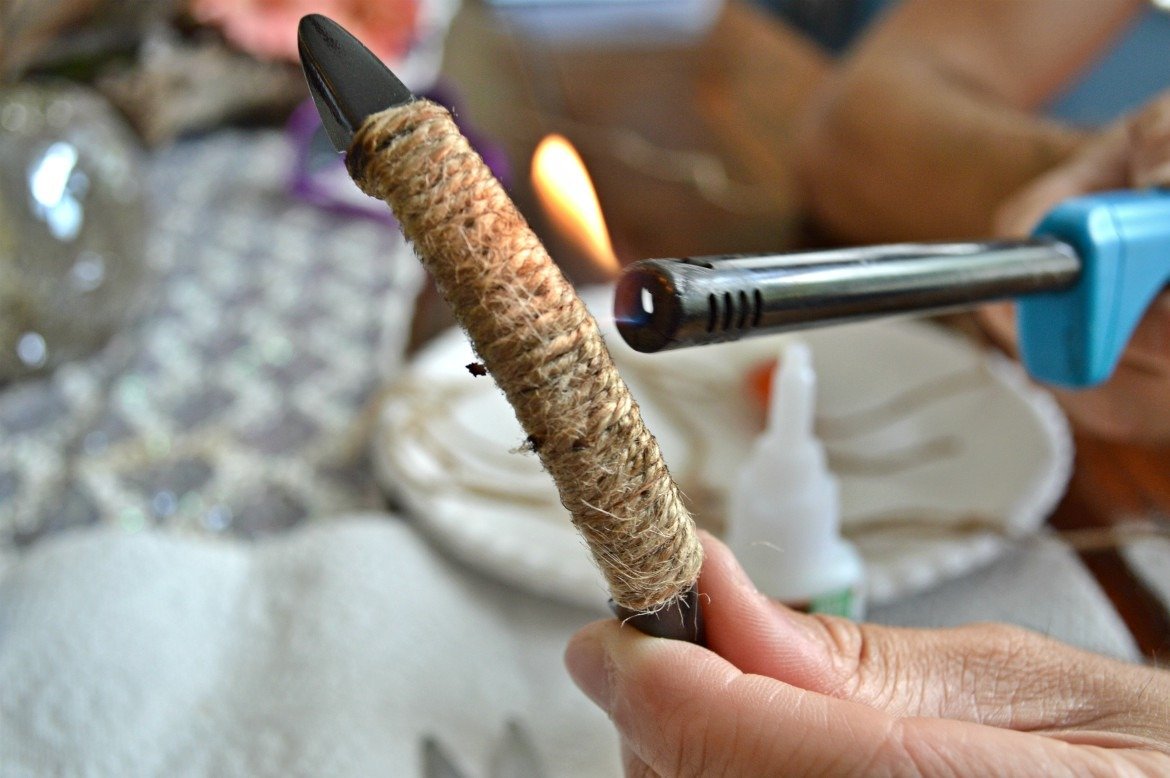
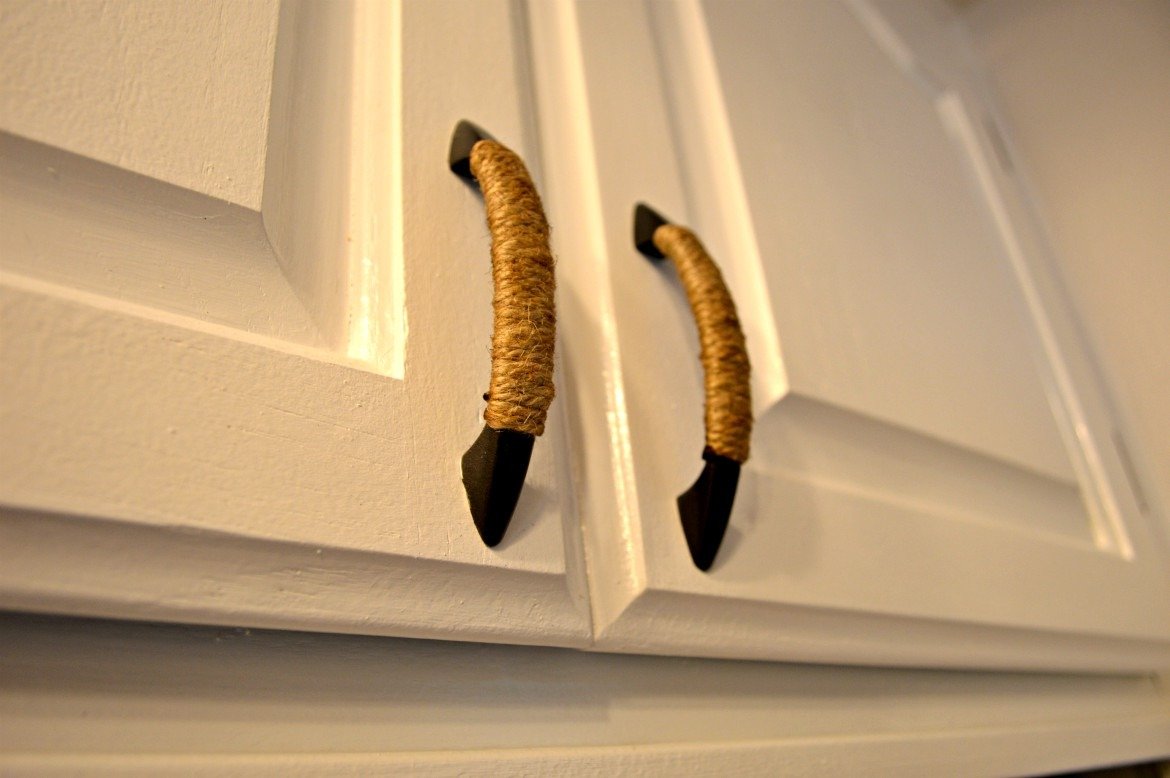
After (Not frizzy!) - Apply some of the super glue at the beginning loop just to hold it in place so it can’t wiggle out over time. And you’re done! Allow them to set for an hour before hanging, and enjoy your now updated kitchen hardware!

Share, pin, tweet and comment with your feedback!