Ah, the dreaded hair removal wax. Either you love it, or hate it. I used to get my eyebrows waxed for years – absolutely LOVE it – but never any other part of my body waxed. And I paid for it; every 3-4 weeks, $20 fluttered out of my pocket for two or three quick strips ripped from my face. That sounds awful when said aloud.
About a year ago I purchased the GiGi Mini Pro Starter Kit, which is a professional wax starter kit. I did my research, and tried several other waxes out there that didn’t work like at the salon, and I was promised that this wax kit would do the job. This beaut has saved me so much money in razors, and more with how much I’d spend to have someone wax for me!
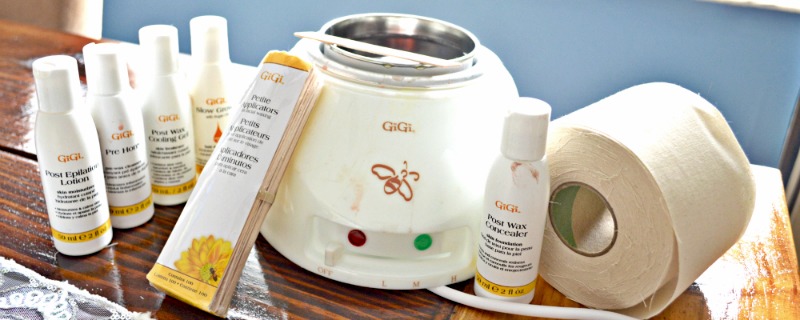
It came with a little wax warmer, all the necessary essentials like the muslin wax strips, and even pre/post wax lotions and cleansers. But I went ahead and bought the huge toilet roll of muslin (and I would recommend you do the same when you buy the kit).
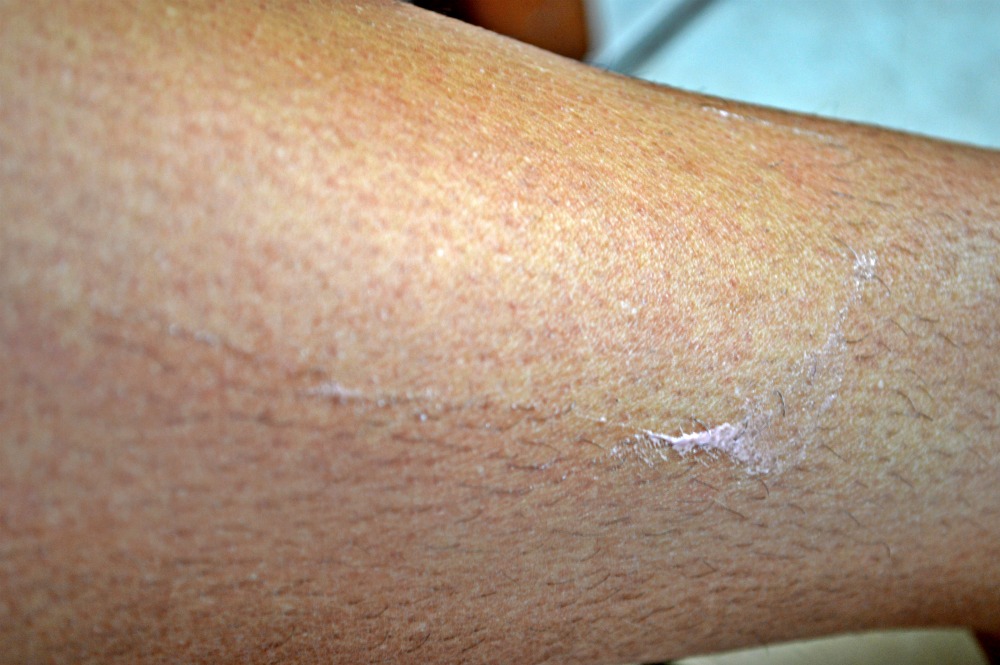
It took many tries to get the wax down, and on how to do it correctly. I’m talking hair length, how to apply the wax, ripping off the strip, the direction to rip off the strip, and how to efficiently wax off an entire leg. Truth is, I don’t get EVERY little hair – OK – let’s be real, and I doubt a wax professional does, either. But the more you wax in general, at least for me, the thinner the hair grows back and the longer it takes for the hair to even grow back. So you miss a hair, two or a patch – it’s OK.
By now, after a year, I have perfected the leg wax, and have convinced myself to do a blog and video tutorial on how you can do it, too. It’s not easy the first time, and it’s MESSY. So be sure to read through the entire post before watching the video for quick tips and detailed instructions I won’t tell you in the video.
DIY Step By Step Hair Removal Wax Tutorial
THE PERFECT WAX:
The wax that seemed to work just like the ones you find in the salon is like this one here. It’s a complete starter kit for newbies – the wax glides right on, and dries quick with no residue. You can try those all natural waxes (like I have) that you just heat in the microwave, but they never worked on my thick coarse hair. So, go with salon grade products like the GiGi Wax Starter Kit. They have multiple types of waxes to choose from, such as aloe and wax for sensitive skin.
QUICK TIPS:
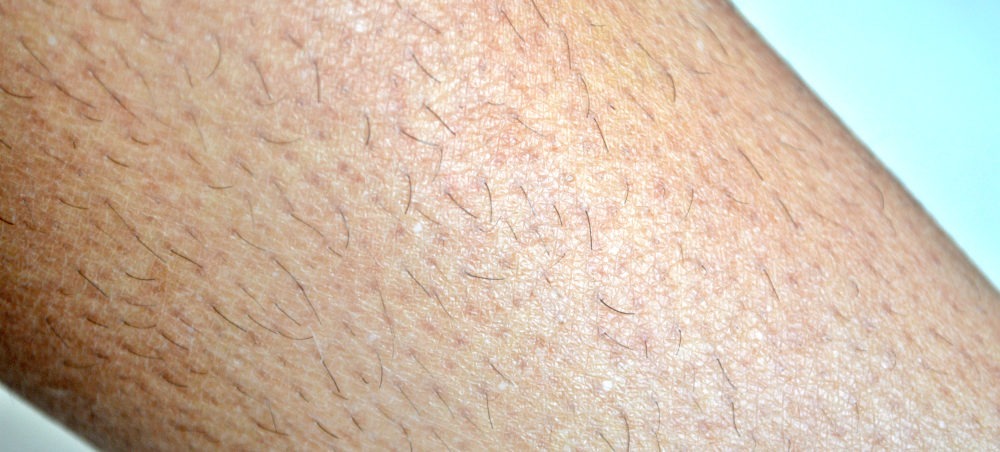
- Make sure the hair is AT LEAST 1/4 inch in length (if it’s not, you may not catch as much hair in the wax)
- Figure out which direction in which your hair GROWS, this is important, as you will apply the wax different from how you will tear off the strip
- Do not overheat the wax (start the wax warmer on LOW/MEDIUM), otherwise it will be runny, drip everywhere, and harder to spread on the area
- Use the bigger sticks for legs, smaller for eyebrows (common sense)
- TEST the wax on your skin first before waxing (make sure your skin won’t have any allergic reactions)
- PREPARE your skin for the wax (using the cleanser), and make sure your skin is DRY before waxing (no lotions beforehand), use baby powder or a small amount of flour to rub on the area(s) before waxing if needed for oily skin
- BIG TIP: if you don’t need to, only wax from the knee down. Sometimes you don’t have hair thick enough on your thigh to wax, and it will save you time and wax.
Connect with me on Twitter, Instagram & Facebook so you don’t miss the latest blog updates!
DIRECTIONS: Please read the directions BEFORE watching tutorial video
- Start by setting your warmer on LOW/MEDIUM, so that the wax isn’t runny (thick enough to dish out but will leave a thick layer on your skin, not drippy). Cut your muslin strips, unless you’re using the already cut strips. Make sure they’re large enough to cover a good 1-2 inch section.Again, the hair of the area needs to be at least a quarter inch in length in order to take hold in the wax. So I have concluded that if the hair begins to ‘curl’ slightly, then it’s long enough. I know that seems like a LONG time to go without shaving in order to wax, but trust me, they need to be long – and I guarantee you after the first few times waxing, you’ll find you won’t HAVE to as much, and the hair will grow back THINNER and SOFTER over time. And I don’t even wax above my knees, so that saves me so much time to do a quick shave on my thighs every once in a while, and waxing doesn’t take as long since I’m technically doing half my legs.
- Figure out where you’ll start waxing (I think it’s easier to start from bottom to top, in circles), so you would start at your ankle, wax in a circular pattern around your ankle, then move upward and repeat. So you don’t forget where you’ve done, and if you need to do another area again, you can without losing your place.
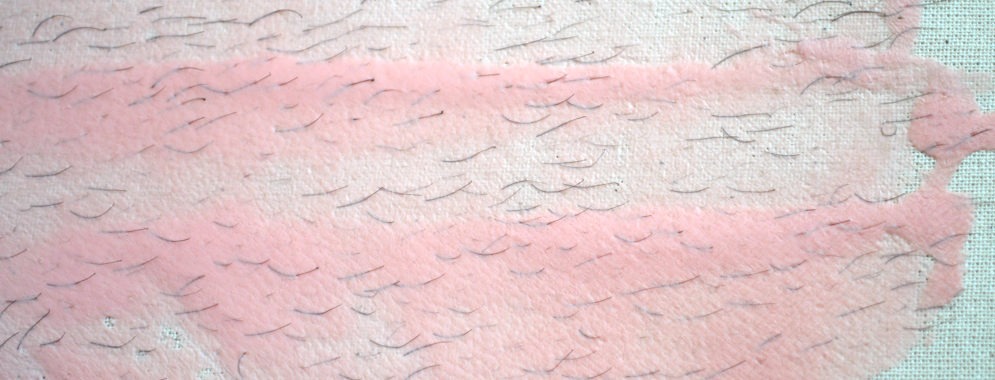
- With one of the larger sticks the kit supplies, stir the wax, and with a generous amount, apply on the first area you’ll begin. APPLY THE WAX with the direction in which the hair grows (IMPORTANT). So if your hair grows toward your feet, apply the wax downward. Spread the wax so it makes a thick coat over the hair. If you can still see the hair that’s okay. You’ll start to learn how much wax to apply in order to catch the hair.
- Once the wax is applied, place one of the muslin strips over the wax. Again, rub over the strip in the direction of which the hair grows, allowing the wax to harden for about 15-20 seconds before removing.You will remove the strip AGAINST the direction in the which the hair grows, so against the grain. DO NOT remove in the direction in which you applied the wax (this won’t remove the hair, or not as effectively). Remove the strip quickly! That is key, because the slower you do it, the more is actually hurts.*When waxing knees or areas of extra skin, TIGHTEN your joints. So when waxing your knee, DO NOT lay your leg flat on the ground, BEND your knee so the skin is taut for the area to be waxed. If the skin is not taut, you skin damaging your skin, the wax won’t catch the hair, and the wax cannot be removed completely.*
- Repeat the process.
VIDEO TUTORIAL:
Below I have provided an image gallery example of hair length, and wax removal visual for product guarantee. I hope this post encourages you to try to wax on your own, and exceeds your expectations on DIY waxing hair removal.
Share, pin, tweet and pass it on!